Visualising vectoradd_jax with Streamlit
This example shows how to quickly generate a Streamlit app to interact with the vectoradd_jax Tesseract.
Using tesseract-streamlit, you’ll get an app with autogenerated input controls and optional Python-defined visualisations — no UI code needed! 🚀
📥 Step 1: Download the Example Code
We’ll use the vectoradd_jax example from tesseract-core version v0.9.0. Clone it with:
git clone --depth 1 --branch v0.9.0 https://github.com/pasteurlabs/tesseract-core.git ~/Downloads/tesseract-core
📦 Step 2: Install Requirements
Install the required packages for this example:
pip install -r requirements.txt
🛠️ Step 3: Build and Serve the Tesseract
Use the Tesseract CLI to build and serve vectoradd_jax:
tesseract build ~/Downloads/tesseract-core/examples/vectoradd_jax
tesseract serve vectoradd_jax
[!NOTE] Make note of the
PORTandPROJECT IDprinted to stdout — you’ll need them shortly.
⚡ Step 4: Generate and Launch the Streamlit App
With tesseract-streamlit installed, generate and launch the app in one step:
tesseract-streamlit --user-code udf.py "http://localhost:<PORT>"
This writes the app to a cache file and launches Streamlit automatically.
udf.py can be found in under tesseract-streamlit/examples/vectoradd_jax/.
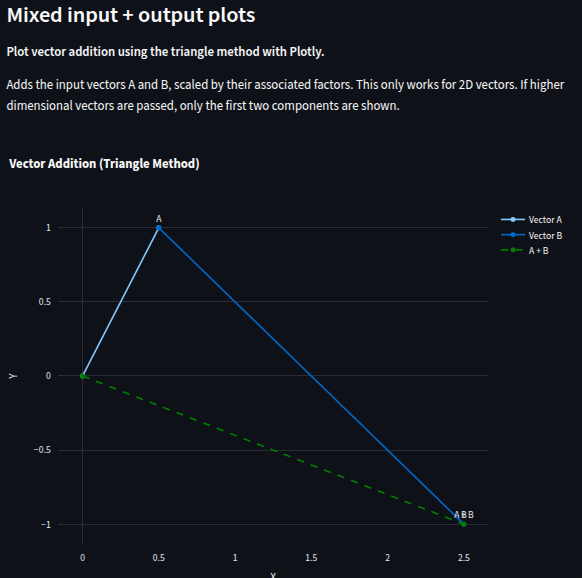
It contains a custom function that takes the Tesseract’s inputs and outputs and drops a Plotly-powered vector addition diagram straight into the web UI — automatically! 🎯
Check it out to see how it works.
[!TIP] You can also skip Step 3 entirely and let
tesseract-streamlitserve the Tesseract for you:tesseract-streamlit --from-image vectoradd_jax --user-code udf.py
If you prefer to generate a script to run later, pass an output path:
tesseract-streamlit --user-code udf.py "http://localhost:<PORT>" app.py
streamlit run app.py
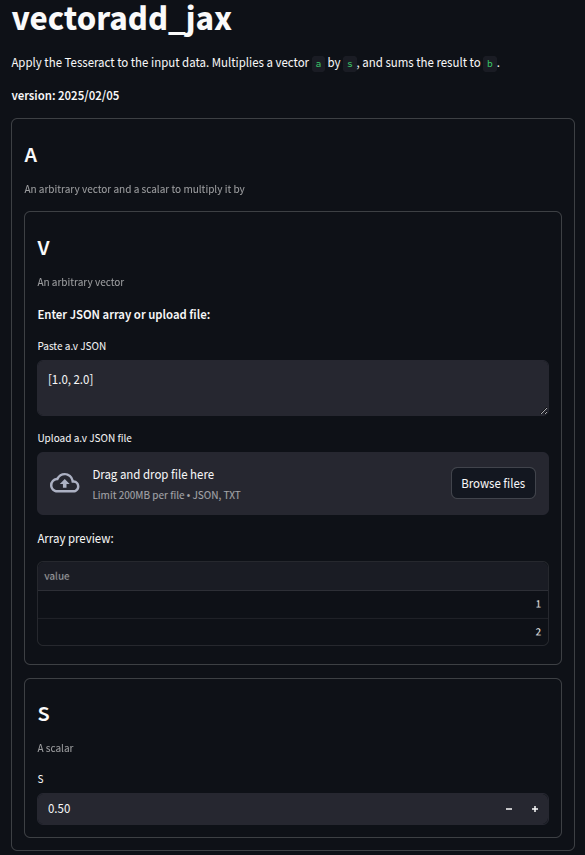
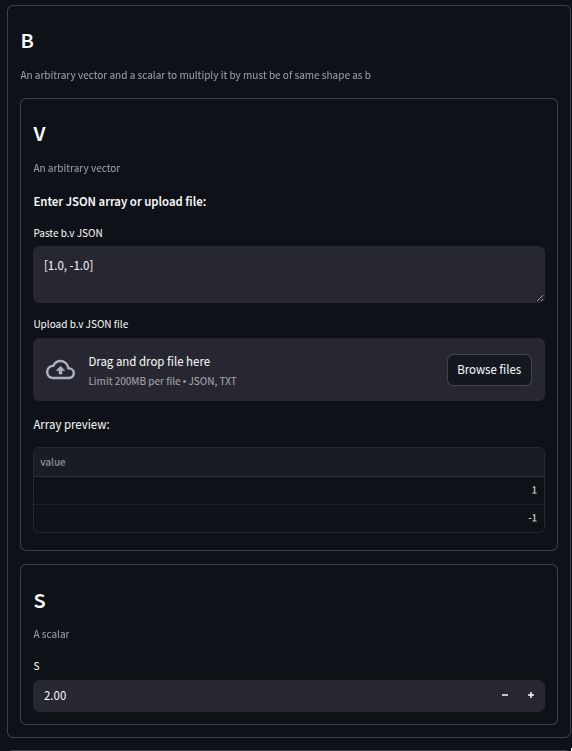
This will launch a web interface for submitting inputs, running the Tesseract, and visualising the results.
🖼️ Screenshots
|
|
|---|---|
|
|

🧹 Step 6: Clean Up
When you’re done, you can stop the Tesseract server with:
tesseract teardown <PROJECT ID>
🎉 That’s it — you’ve transformed a running Tesseract into a beautiful Streamlit web app with interactive plots, with minimal effort from the command line!